Sep 1, 2021

How to make Blender Butter


Did you know you can make Butter from your blender? This homemade butter is very easy, creamy and delicious. When I was in Cochin, I learned to make butter from my mom. It was fun and the butter always turned out excellent. Making butter in your blender may not be nostalgic, but it gets the job done and the butter is still amazing!

Ingredients:

 Organic Whipping Cream   2 Cups
Plain Yogurt                        2 Teaspoon (optional)      
Ice Cubes                           Few
Salt                                     ¼ Teaspoon (optional)

 Preparation:

Culture the Butter (optional)
  • The day before you like to make butter, pour a cream into the big bowl add the plain yogurt. Whisk briefly to combine and cover the bowl with a clean kitchen towel. Set in a slightly warm place to culture. Check after 8 to 12 hours.
  • If you did not culture your butter, let it warm on the counter for about an hour before churning.
  • Pour the heavy cream into the blender. Cover tightly. Blend it on high. You'll want to shut it off periodically to scrap down the sides and mix it up a little.
  • Continue blending till the heavy cream begins to separate , about to 5 minutes.

  • The mixture will splatter heavily in the final stages of churning.
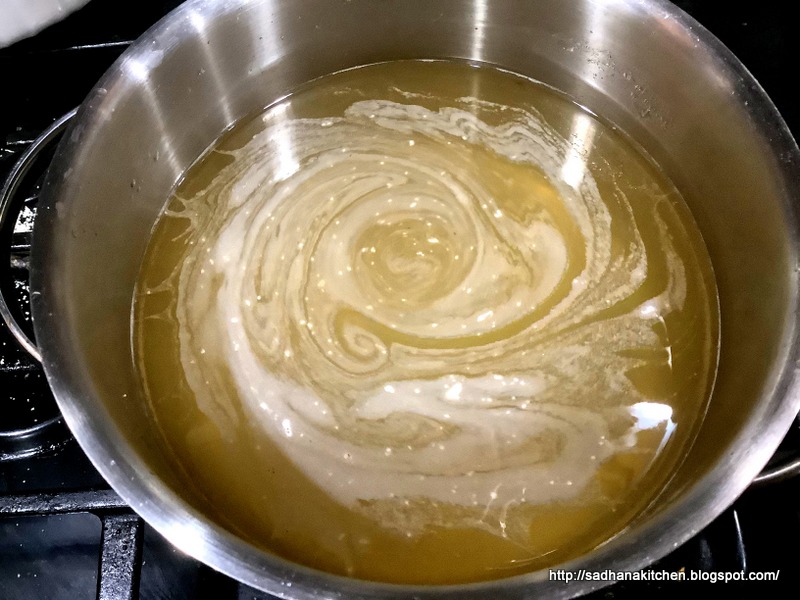
  • You will see beginning of butter and butter milk, and continue blending for another minute.
  • Pour the butter milk through the cheese cloth and holding the butter solid back.
  • Add cold water with ice cubes to cover the butter. Drain the water.
  • Pour off the cloudy water, add another 1/2 cup of ice water to the bowl, and keep pressing. Repeat until the water is clear. Transfer the butter into cheese cloth.
  • Bring the edges of the cheese cloth together over the butter and squeeze the butter out with your hands.
  • Now run the butter under cold water and continue to squeeze. This will allow the butter to last longer.
  • Sprinkle the salt over the butter (Optional)  and knead it.
  • Cover the butter with parchment paper, store it in airtight container for up to three weeks in refrigerator  .Can be frozen for 6 months.


Notes:

  • Homemade butter’s shelf life depends on how thoroughly you extract the buttermilk. If a substantial amount of buttermilk remains, it will sour within a week, otherwise homemade butter can keep for up to 2-3 weeks in the fridge.


Aug 1, 2021

Pudalangai Kootu / Snake gourd Kootu


This kootu is common in every house. This is very yummy and easy Kootu. Check the health benefits of the snake gourd here. http://www.medindia.net/patients/lifestyleandwellness/snake-gourd-glory.htm

Ingredients
 Big Pudalangai                                       1no.
Carrot (cut)                                            ¼ cup
Tomato (chopped)                                1no.
Cooked Moong dhal                            ¼  cup
Turmeric powder                                  ¼ tsp.
Salt to taste
GRIND ROUGHLY
Coconut                                                3 tbsp
Jeera                                                     1/4 tsp
Green chilies                                       3 no
Curry leaves                                        1 stem
 SEASONING:
 Coconut oil                                        1 tbsp.
Red chilies                                          2 no
Jeera                                                   1 tsp.
Hing                                                    ¼ tsp.

Method:
  • Cook the moong dhal in pressure cooker.  Keep aside.
  • Wash and cut the Pudalangai into small pieces. Precook the Pudalangai with carrots in microwave for 3 minutes.
  • Take a kadai add the precooked vegetables.  Add a little water and boil it. When vegetables are half cooked add the cooked moong dhal and chopped tomato on it.
  • Add turmeric and salt and cook for few more minutes.
  • Grind coconut, Jeera, curry leaves and green chilies together roughly. Add to the vegetables and cook for 3 minutes.
  • Heat the kadai add oil and fry seasonings. Add to the kootu.
  • Garnish with coriander leaves
  • Yummy Kootu is ready to be served.


Jul 1, 2021

Idiyappam/ String Hoppers/Instant Sevai


Idiyappam / Sevai / Nool Puttu / String Hoppers are a famous south Indian dish which serves as breakfast or dinner . These are so simple and made out of rice flour and water. Very healthy as it is only steamed.This healthy and nutritious Idiyappam in other words is rice noodles which are served with sweet coconut milk & vegetable stew.


Ingredients

Roasted Rice Powder           2 cups.
Salt                                       To Taste
Sugar                                    1 Tsp.
Grated Coconut                     ½ cup
Boiling Water                        1 ¼ - 1 ½ cup  
Coconut Oil                            1 Tsp.

Method:

  • Combine salt, sugar, coconut oil and roasted rice flour. Add boiling water gradually and using a wooden spatula mix the dough.
  • Add water till the dough comes together and knead well to make soft dough without any lumps. Cover the dough with a wet cloth ( it prevents the dough from drying out).


  • Make medium sized balls and keep it aside.
  • Take Idiyappam mould and grease inside and fill one portion of dough.
  • I use my idli mould & stand to make small Idiyappam. You can use steaming-plates as well for this.
  • Sprinkle the grated coconut on these moulds.Press through the mould.


  • Put a idli steamer on heat. (You can use pressure cooker for making Idiyappam).
  • Pour water, just 1-2 cups would be sufficient for one go. Once the water starts boiling , place the idli stand and steam for 10 minutes in high flame.
  • Open the steamer after a while and take out the soft Idiyappam and transfer to the serving plate.
  • Enjoy the healthy Idiyappam with vegetable stew.


Note: 
  • Rice flour should be “fine and smooth”.
  • To Get Authentic taste, use only White Rice flour and fresh coconut.
  • Knead the dough very well and make soft ball.
  • Use mould with very small holes to have thin noodles.


Jun 1, 2021

YAM MASIYAL/ INDIAN STYLE MASHED YAM


India has so many types of yams, ones that we don’t even dream of here. In USA we rarely get good fresh yam. Yesterday I went to QfC to buy a  yam.

The whole yam vs. sweet potato mix-up is both fascinating and frustrating to me. Mostly frustrating. Basically, when shopping in a US grocery store, if it looks like a sweet potato in size and shape, it probably is, even if it is labeled as a yam. I bought this Yam/Sweet potato. Next day I made this Masiyal for lunch.


The word ‘Masiyal’ actually means ‘mashed’. Masiyal is something that is smashed until smooth and velvety, enjoyed with steaming rice.

Preparation    :   5 minutes
Cooking Time     30 Minutes
Cuisine               South Indian
Serves                3-4

Ingredients

Yam Chopped                         1  ½ cups
Moong dhal                            2 Tablespoons
Turmeric Powder                     ¼ Teaspoon
Grated Ginger                         1 Tablespoon
Finely Chopped Green chillies   3nos.
Lime Juice                              2  Tablespoon
Salt                                       To Taste

For Seasoning/Tadka

Coconut Oil                            1 Tablespoon
Mustard Seeds                        ½ Teaspoon
Cumin Seeds                          ½ Teaspoon
Hing/ Asafetida powder            ½ Teaspoon
Curry Leaves                           Few

Fresh coriander leaves for garnish

Method:

  • Wash and Peel the yam/Sweet Potato. Chop and pressure cook for 1 Whistle. Mashed them well.
  • Boil moong dal, mash and keep aside.
  • Mix the mashy yam and dal together.
  • Heat oil in a pan. Once hot, add the mustard seeds and allow it to splutter, add cumin seeds , Hing and curry leaves. grated ginger and chopped green chillies fry for a minute.
  • Add to the yam, dal mash and stir well. Add some lime juice and mix. Allow cooking for a minute  and switch off the flame.
  • Serve hot with rice.


Notes:

  • The dal is optional, feel free to omit if you would like just plain Yam/Sweet Potato taste
  • You can substitute with either tovar dal or masoor dal. 


May 1, 2021

Pineapple Kesari/Pineapple Sheera/Pineapple Kesari Bath


A popular dessert recipe made in South India on auspicious occasions and festivals. This mouthwatering Sweet Dish is cooked with Pineapple, Rava, Sugar, Ghee, saffron and nuts. You will love this delicious melt in mouth Kesari/Sheera with mild pineapple flavor. Here is how to make best pineapple Kesari at home!

Ingredients

Coarse Rava/Semolina           1 Cup 

Chopped Pineapple                 ¾ Cup
Desi Ghee                              ¾-1 Cup
Sugar                                     1 ½ cup – 2 Cups
Boiling Water                         2 ½ cup – 3 Cups
Saffron                                  ¼ Teaspoon
Crushed Cardamom Powder     1 Teaspoon
Warm Milk                               3 Tablespoon
Raisins                                      1 Tablespoon
Cashew nuts                              1 Tablespoon

Kesari Preparation Method:


  • Wash the Pineapple and remove the skin and chop it into cubes. Add 1 teaspoon of sugar and mix well. Keep aside.
  • Add a saffron into the warm milk and mix it well and keep aside.
  • Heat 2 tablespoons ghee in a thick pan. Add cashews and raisins. Fry till golden. Keep aside.
  • In the same pan, add 1 tablespoon of ghee, add the Rava and roast it. until the raw smell disappears, you get the nice aroma and Rava turns golden brown. 
  • Transfer the roasted Rava to a plate.
  • In a mean time boil the water, add the sugar and melt it.

  • By this time, Heat pineapple cubes with a little water. The mixture would also begin to boil..
  • Pour the sugar syrup to the roasted Rava. Stir quickly and briskly so that lumps are not formed. Add the saffron milk and mix well.

  • Simmer on a low flame and add the pineapple and mix well. Allow the Rava to absorb the water.

  • Add the ghee and stir well. Takes about 4 to 5 minutes on a low flame. Keep on stirring, so the Rava does not get browned.

  • Turn off the heat and add fried raisins and cashews and cardamom powder. Mix it well.

  •  Enjoy the Hot pineapple kesaribath.


Notes:

  • To get the good tasty Kesari, always use the ripe pineapple.
  • Use good desi ghee to make Kesari.
  • Pineapple Kesari stays 3 to 4 days in the refrigerator. To reheat you can microwave or gently reheat on stove top with two teaspoons ghee.
  • You can use Tinned Pineapple. Using tinned pineapple
    slices, no need to boil them in water. Just add them directly.
  • You can grind the pineapple add to the boiling water.


Apr 1, 2021

Spicy Whole Brown Lentils / Whole Masoor Masala Dhal


Beans and Pulses are naturally low in fat, high in fiber and rich in protein. Lentils are one of the best sources for iron, protein, folic acid and zinc.
Brown lentils are simply whole red lentils. But it will take to cook longer time.
Brown Lentils

Cuisine:          North Indian
Prep Time:      10 Mins  
Cook Time:     25 Mins 
Serves:           4

Ingredients

 Whole Brown Lentils    1 cup, washed                              
Water                          2 – 2 ½ cups
Grated Ginger              1 Tablespoon
Chopped Tomatoes       1 Cup
Beaten curd                 2 Tablespoons
Chopped Coriander       2 Tablespoons for decoration
Salt                             To Taste

Masala Powders:

Turmeric Powder           1 Teaspoon
Red Chili Powder           1/2 Teaspoon
Coriander Powder          1 Teaspoon
Chole Masala Powder      ½ Teaspoon
Amchur/Mango Powder  ½ Teaspoon
Hing  Powder                 ¼ Teaspoon

For Seasoning:

Ghee                            2 Tablespoon
Cumin Seeds                ½ Teaspoon

Method
  • Wash and soak the dhal for 10 minutes. Pressure cook for 3 whistles. Keep aside.
  • Heat the pan, add oil/Ghee add cumin seeds , let it splutter.,
  • Then add the chopped tomatoes, grated ginger .
  • Add all masala powders expect Chenna masala powder, mix well and sauté for a minute .
  • Cook until tomato gets mashed and oil floats on top, add cooked dal.
  • Add enough water to cover the dal and bring it to boil.  Add salt and beaten curd .
  • Cook it in  low flame (depending on how mushy you would like your dal to be, but make sure your Masoor holds shape and does not become beaten).
  • Bring it to a boil, now add Chenna  masala and simmer for 5 minutes in slow flame.  Off flame and let the dal sit for 5-10 minutes before serving.
  • Now dhal is ready to serve. Garnish the dhal with chopped coriander leaves.
  • Serve hot with steamed rice or roti/paratha along with achar, papad or a simple stir fry.
Brown Lentils Masala


Mar 1, 2021

Raw Green Tomatoes Chutney


'
I am a Big fan of Green tomato chutney. This chutney is easy and simple chutney made with fresh green tomato, coriander leaves and spiced with green chilies. Tomato Chutney,  which serves as a nice combination with rice and  any tiffin items.

Cuisine:          South Indian  Prep Time:    5 Mins           Cook Time:   3 Mins      

Ingredients:

Green Tomatoes            4 no.
Green Chillies                2- 3 nos.
Grated Ginger               1 Tablespoon
Chopped Coriander        ½ cup
Grated coconut              1 Tablespoon.
Coconut Oil                   1 Tablespoon
Cumin seeds                 ¼ Teaspoon
Red chilies                    1 no. 
Hing Powder                 ½ Teaspoon
Salt                             To Taste.

To Seasoning:
 Coconut Oil                 1 Teaspoon
Mustard seeds               1/2 Teaspoon

Method:

  • Wash and  cut the tomatoes.

  • Heat the Pan add coconut oil and put cumin seeds , hing powder and red chilies,fry them until they are roasted .
  • Now add the chopped tomatoes and fry for a minute , add the salt and mix well. Now  cover it and cook until it turns pulpy. It takes 4-5 mins. Cool the mixture slightly.

  • Take blunder/Mixie , put green chillies, ginger, and coriander leave . Grind for a second.

  • Add cooled tomato mixture and grind it to a coarse paste. I usually do it in whipper mode to get slight coarse and pulpy Chutney.
  • Serve with Rice, Dosa , and tiffin items.

Notes:
  •       You can store it in refrigerator for 2 days in an air tight container.
  •       Add or reduce green chili to your taste.
  •        If you find the Chutney very tangy, add a pinch of sugar or Lemon juice while grinding the chutney.


CURD RICE/DADDOJANAM

Yogurt Rice Tempered with Spices and. Pomegranate.   This moist, pleasantly seasoned rice and yogurt dish in the South Indian ...