Showing posts with label North Indian. Show all posts

Jan 1, 2020

Karachi Halwa/ Corn flour Halwa/Corn four Pudding


HAPPY NEW YEAR 2020


This post is very special and I am really happy to write my  Madappalli’s 9th Anniversary . Thanks  for the support , comments and  appreciations. That helps me to  continue travelling in my culinary Journey. I want to share this recipe to celebrate with you.  Bombay Karachi Halwa , also popularly known as Corn flour Halwa. These small square shape Halwa made  in different colors.  You can make pretty much any flavour or colour you like. Next time I am going to do it pink with some rose petals and rose essence, maybe you could try it instead of the Yellow color.

Preparation Time : 2 mins
Cooking Time : 15 to 20 mins
Makes : 20 to 30 pieces

Ingredients:
Corn flour/ Cornstarch    1 cup
Sugar                               2 1/2 cup
Water                              2 ½ -3 Cups
Ghee                                1/4 Cup
Chopped Cashew nuts       ½ cup
Green Cardamom Powder  1 Teaspoon
Yellow Food Color             1/8 Teaspoon
Cream Tartar Powder       a pinch (Optional)
  
Method:
  • Grease the glassware / tin with the ghee. Keep aside.
  • Heat 2 tbsp ghee in a small pan. Add in the cashew nuts and roast until it turns golden brown. Keep aside.
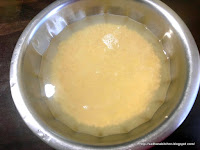
  • Mix the corn flour& cream Tartar (optional) with 1 ½ cup of water and whisk them until there are no lumps. Add the food color and mix it well. Keep aside.


  • Take a heavy bottom pan, Add the 1 1/2 cups of sugar, add the remaining 1 cup of water to it. Mix them, turn the heat in to medium flame. rapid boil for say 3 to 4 minutes till slightly thick.
  • Slowly mix the sugar solution until the sugar crystals get dissolved completely.
  • Now reduce the heat, slowly pour in the corn flour mixture to the boiling sugar. syrup and whisk the mixture continuously so that there are no lumps formed.
  • Next, start adding the ghee – slowly at first. Keep stirring to ensure there are no lumps. Then add the rest of the ghee and incorporate. Cook again, mixing all the time until thick.

  • Add in the chopped cashew nuts and cardamom powder. Stir till the mixer leaves the side of the pan. Now the texture would be like semi thick glassy form.

  • Pour the mixture into the greased pan, tap the ends to make it even. Rest the halwa for the least 1 to 1 1/2 hours and cut into slices and store in the refrigerator for a longer shelf life.

  • Enjoy!


 Note:
  • You can use any nuts for the Halwa
  • You can use Custard powder instead of Corn flour.
  • If you want to serve hot halwa, scoop it in a bowl, you can eat immediately.


Apr 1, 2019

Raw Turmeric and Manga Inji Pickle/ How to make Fresh Ginger Turmeric Pickle


Turmeric is the best medicine in Ayurveda. It cures the whole person. Turmeric is pungent, bitter, astringent and heating and has a pungent vipaka.. As you all know it is needless to say about the goodness of turmeric and Ginger

This Fresh Turmeric and Ginger Pickle can be made only when the ingredients are in season, but when they make their appearance in the market, almost every household whips up a batch of this pickle as it is not only tasty but also good for health. When I saw Kacchi Mango Ginger and Turmeric Root in the market I decided to buy it and make a pickle out of it.

Fat Free ,Gluten free, High Fiber, Low Calorie, Sugar Free
  
Recipe Category :      Pickle
Cooking Time      :       0 minutes
Preparation Time :      20 Minutes
Makes                    :     1 ½ cups
Storage Time        :     Up to 1 Week

 Ingredients:

Fresh Turmeric
250 gms
Fresh mango Ginger
250 gms
Fresh Tender Ginger
50 Gms
Green chillies
6 Nos.
Lemon Juice     
1 Tablespoon

Lemons
2 Nos
Organic Himalayan salt
2 Tablespoon or to Taste (can use sea salt or rock salt)

To Be Grind

Mustard Seeds     
1 Teaspoon

Fennel Seeds         


1 Tablespoon


Method:
  
  • Wash & Rinse the Turmeric, Ginger and Green Chillies and wipe well with a kitchen towel, so that no moisture is left.

  • Scrape away the skin and cut into thin round slices.
  • Cut the Lemons into small pieces.

  • In a mortar add Mustard & Fennel Seeds and using a pestle grind gently.


  • Add  all the  chopped pieces to a big vessel.

  • Add salt and  Mustard mixture to the Chopped pieces. Mix well.
  • Now find an area with direct sunlight and let the vessel sit under the strong rays for at least 4 to 6 hours. you can cover the top with one of those lids with a fine mesh which we use to cover fruit.
  • Once the mixture has had enough sun , store it to the sterilized Glass Bottle.

  • Now you can keep this Haldi Adrak Mirch Achar  in the Refrigerator for  2 days, and then start using Haldi Adrak Mirch Achar thereafter.
  • Serve with Curd Rice, Chapati  and Kanchi. 


Feb 1, 2019

Bombay Pav Buns/ Dinner Rolls/ Home made Buns


I’m here today to share Eggless Pav Bread Buns Recipe. Nothing makes a Homemade Pavs/Buns special quite like dinner rolls. You can make Pavs from your favorite bread mix. Soft Pavs/Dinner Rolls are usually a little richer than bread recipes with more sugar and fat than corresponding bread recipes. This feather-soft bun is best had with a spicy bhaji or vegetable curry, but you can also serve it as a sandwich lined with chutney and packed with potato vadas.

Preparation Time:     1 ½ hours
Baking Time:             20-25 Minutes
Serves       :               8 to 10 Pavs        

Ingredients:
All Purpose Flour/ Maida               2 cups
Organic Sugar                             1 Tablespoon
Salt                                            ½ Teaspoon
Melting Butter /Oil                        2 Tablespoons
Extra flour for kneading the dough
           
For Proofing Yeast:
Warm Milk                                   ¾- 1 Cup
Sugar                                          1 Tablespoon
Instant Active Dry Yeast                1 Tablespoon

Other Ingredients:
Milk for brushing
Butter for brushing
Extra Butter and flour for greasing and dusting the pan

Method:

Proofing yeast:
  • Warm milk in a bowl, add sugar and then yeast. Mix well and keep in a warm place for 10 to 15 minutes till it becomes frothy

 Making Dough
  • In a bowl add all-purpose flour and a little salt and sugar.
  • Mix and make a well in the center of the flour.
  • Add the yeast mixture to the well.
  • Add butter (or Oil) and knead it for 10 Minutes.
  • Once kneaded, insert the fingertip into the dough and it should bounce back clean, which means the dough is ready.
  • Add the oil-butter mixture. Knead again for 5 to 8 minutes by stretching the dough and folding it back till it is smooth and elastic

  • Now transfer the dough to a big bowl, cover and keep aside in a warm place about one hour (or more depending on your climatic conditions).

  • The dough will rise and double or even triple in volume.
  • Once the dough has risen, remove it from the bowl and knead it for another 2-3 minutes. This step is important for lighter pavs.
  • Divide the dough into 12 equal portions. Roll each portion of the dough into a smooth round.
  • Grease a cake tin with oil and place the shaped dough balls. Now cover the tin with damp cloth or a plastic wrap and keep aside for another half an hour (or a little more) till they rise.
  • Remove the damp cloth after 30 minutes, you will see that the pavs have risen.

  • Brush the dough with the milk.

Baking Pavs:
  • Bake it in a pre-heated oven at 200°c (400°f
  • Place the cake tin in the oven and bake pavs for 20 Minutes.
  • The pavs should evenly brown from top.
  • Turn off the oven and remove the pavs.
  • Once cooled, de-mould it and brush the Pavs with butter and cool completely.
  • ENJOY with Pav Bhaji.!!
  • Store pavs in a zip lock bag or airtight box to prevent them from drying. They are good to go for 2 to 3 days. You can also refrigerate them for a week or more.


Jan 1, 2019

Shankarpali


Shankarpali is famous Maharashtrian sweet made during Diwali festival. It is rich in carbohydrates, making it an instant source of energy. It has simple recipe and results in scrummy munch sweet snacks that can be prepared in advance and stored for approx 3 weeks.

Ingredients

All Purpose Flour (Maida)         3 cups
Powdered sugar                      1- 1¼ cup
Rava (Semolina)                      1 cup
Oil/Ghee/ Vegetable fat            1/2 cup
Cooking oil                              for deep frying
Cardamom powder                    ½ Tsp.
Salt                                          a pinch.

 Method:

  • Take a big bowl and add all-purpose flour, rava , powdered sugar,cardamom powder and salt .
  • Now add the melted ghee or oil .Mix into a crumbling mixture with hands.
  • Now knead this crumbling mixture into smooth dough adding water little by little as required.    Keep kneading the dough for about 15 minutes with pressure.
  • Keep this dough covered with damp cloth for 10 min.
  • Divide this dough in 3 large balls. Take one ball, round it smooth, flatten and roll out into large thin (not very thin but thin) circle.
  • Cut rolled out dough into strips vertically, and then again horizontally, making about an inch sized strips. Separate those cuts on a plate.
  • Heat oil in a kadai once the oil is hot add the shankarpali to it ensuring gas is on low flame. Once the shankarpali are nice golden brown remove them. Repeat the same procedure with the remaining of the dough.
  • Once its fried allow them to come to room temperature.
  • Store them into an airtight container. This should last for about 3 weeks,that is if you resist them that long!
  • Enjoy crunchy munchy-soft sweet bites with hot coffee/tea.


Nov 1, 2018

515: Dhaba Style Dal Tadka / Tadka Dal


Dhaba Style Dal Tadka


Dal Tadka is a Dhaba Staple, found easily at any Dhaba. The way they make dal Tadka in road side dabbas are always awesome.  I don’t like the regular pressure cooker with turmeric and salt only yellow dal. I want mine to have bold flavors, some Tadka (tempering), some masala and only then I’m satisfied. Like this one. The secret of Dhaba dal fry is butter and Cream. Dal Tadka or dal fry with Jeera Pulao is one of my favorite meals.

Preparation Time    15 Minutes
Cook Time                20 Minutes
Cuisine                       North Indian
Serves                        4 Nos.

Ingredient:

Masoor Dal (Whole Red Lentils)     ¼ Cup
Toor Dal / Split Pigeon Pea's-         1 Cup      

Water                                          2 cups
Turmeric Powder                          ½ Teaspoon
Finely chopped Ginger                   1 Tablespoon
Finely Chopped Tomatoes               2 Nos.
Chopped Coriander Leaves             1 Tablespoon
Salt                                             To Taste

Masalas
Red chili Powder                           2 Teaspoon
Hing Powder                                1/2 Teaspoon
Gram Masala Powder                     ½ Teaspoon

For Tadka/ Tempering

Oil/ Butter                                    2 Tablespoon
Cumin Seeds                                1 Teaspoon                            

For Decorative
 Cream                                         2 Tablespoon
Butter                                           1 Teaspoon
Chopped Coriander                         1 Tablespoon  

Method:

Cook The Dal

  • Wash the dal and soak it in 2  cups water for about 15 to 20 minutes.
  • In a pressure Cooker add all the Dals, Salt, Turmeric, ghee and Hing, Water and Pressure cook for about 4 Whistles.


Make a Masala
  • In a large wok or pan, heat the oil. Once the oil is hot, add cumin seeds and stir until the e cumin seeds are golden. Make sure that the cumin seeds don’t turn black.
  • Now add the finely chopped ginger and fry for a minute. Now add finely chopped tomatoes. turn down the heat.
  • Add, red chili powder and  Gram Masala powder , cook until the tomato puree absorbs all the flavors from the spices, about 7 to 8 minutes.
  • Now add the Dal and Water to the Masala. Mix Well.
  • Stir in the cooked dal, add the salt and extra water if required and mix well.
  • Cover with Lid and cook for 3 minutes.
  • Switch off the stove and transfer the dal to the Serving Bowl.
  • Add the Butter ,Cream and chopped coriander to the top of the dal.
  • Serve hot with Jeera Pulao , Rice or Roti


Note:

  • You can use a variety of dals like Masoor dal, urad dal or Chenna dal, either in combination or individually. Adjust the consistency of the water according to taste.
  • Use fresh spices for more flavor.
  • Adjust Salt as per your taste. If you use salted butter you would need less salt.


Jun 1, 2018

509:Thayir Vada/ Curd Vada/ Dahi Vada


A recipe for dahi vada (as kshiravata) is mentioned in Manasollasa, a 12th-century Sanskrit encyclopedia compiled by Someshwara III, who ruled from present-day Karnataka.[4]S( Source https://en.wikipedia.org/wiki/Dahi_vada)
Thayir Vadai are vadais soaked in thayir/curd/yogurt and spiced differently in different regions. The typical Tamil style is made by soaking the vadais in coconut and curd mixture and gently seasoned with mustard, curry leaves and red chillies.  Thayir vadai, everybody’s favorite at home!
Madappalli gives you a simple and tasty Thayir Vadai Recipe. For more recipes, visit our website https://sadhanakitchen.blogspot.com/

Preparation Time             15 Minutes.  
Soaking  Time                  1 Hour
Cooking Time                   20 Minutes
Cuisine                              South  Indian
Recipe Category             Snacks
Serves                                4 nos.

Ingredients:

Urdh Dal                          1 Cup
Raw Rice                          1 Tablespoon
Green Chilies                   1 no. (Chopped)
Grated Ginger                  1 Tablespoon
Asafetida powder              ½ Teaspoon
Salt                                  To Taste

For Curd Vada

Grated Coconut                  2 Tablespoon
Green Chillies                     3 no.
Thick Curd/ Plain Yogurt      2 Cups
Roasted cumin seed            1/8 Teaspoon.
Finely Chopped Cilantro       2 Tablespoon
Red Chilli Powder                 small pinch
Salt                                    To Taste
Sugar                                 1/8 Teaspoon
For Tadka
Oil                                      1/2 Teaspoon
Mustard Seed                       ½ Teaspoon

Method

For Making Vadas
  •                               
  • Soak a cup of full Urad daal along with a spoon of rice for an hour. Then wash and drain it well.

  • Grind the green chillies, ginger, salt, asafetida with the curry leaves. You need to add a little water to grind it. Add the soaked urad dal and grind till it becomes fluffy.
  • Heat Oil on medium heat. Wet you palm and scoop up a small portion of batter in your hand,
  • Gently drop the batter into the hot oil. Allow vadai to get medium golden brown on one side before flipping over to the other side. 
  •  Allow other side to get medium golden brown and remove onto a paper towel to absorb excess oil. 
  •  Repeat process for all the batter to make vadai.


Thayir Vadai Preparation:

  • Once the vadais are made Soak them into a bowl of hot water  for about 10 seconds on each side. Take them out and squeeze out the excess water.
  • Grind coconut and chillies with a tablespoon of yogurt and add roasted cumin powder and mix well. Mix this mixture with the rest of the yogurt and add salt.
  • •Take a seasoning pan, add oil, mustard seeds, and curry leaves. When mustard seeds start spluttering
  • Switch off the stove. Pout this Tadka into curd Mixture. Mix it well.r
  • Divide this mixture in 2 parts. Cover and refrigerate one half. The other half, dilute with 1/2 cup of water.
  • Arrange three or four sets of Vadai in a flat bottom dish. Add diluted yogurt mixture in it. Mix well and Leave it for at least 4 hours
  • This will help it absorb all the water in the yogurt and leave a film of creamy yogurt on top. 
  • Before serving, pour the remaining yogurt mixture on top ensuring it flows on the sides of the vadais too.
  • Garnish with some chopped coriander leaves, , roasted cumin powder and chili powder .


Note:
  • You can add Grated carrots, Crunchy Boondi also makes an excellent garnish and makes the dish even more colorful.
  • You can  use Paniyaram pan to make the vadais . Its more healthy than normal vadais.


Sep 1, 2017

496: Achari Bhindi Masala/ Spicy Ladies Finger Masala


Most people do not like to eat okra or bhindi because it is squishy. However, if you pick the right bhindi recipe, you can have this vegetable in a crispy way.  In this recipe, Bhindi is made with lots of red chillies and tomatoes making it look red hot and spicy, which is how an Indian curry is supposed to look.

Preparation Time  :     10 Minutes
Cooking Time       :     25 Minutes
Cuisine                :     North Indian
Serves                 ;    4

Ingredients:

Fresh Bhindi  / Okra ( chopped)              250gms
Tomatoes             (Sliced )                     3 Nos
Green Chilies    ( Slit)                            2 Nos.
Ginger Paste                                        1 Teaspoon
Salt                                                    To Taste

Masala Powders

Red chili  Powder                                  1 Teaspoon
Amchur Powder  / Dry Mango powder    1 Teaspoon
Chat Masala Powder                            ½ Teaspoon
Turmeric Powder                                ¼ Teaspoon
Coriander Powder                               1 Teaspoon   

For Tadka/Seasoning

Oil                                                    2 Tablespoon
Fennel seeds/Sombhu                       1 Teaspoon
Cumin seeds                                     ½ Teaspoon

Method:

  • Mix all masala powders. Keep aside.
  • Chop the Bhindi into 1 inch piece and marinate with this masala for 10-15 minutes
  • Heat oil in a pan and season it with fennel seeds, and cumin seeds.
  • Then add the marinated bhindi to the pan. Stir regularly and sauté on low flame for 5-7 minutes.
  • Add the ginger- paste and green chillies  to the pan and blend it in. Cook for 2-3 minutes on low flame.
  • Add the chopped tomatoes and sprinkle salt. Mix it well; cover and cook on low flame for 5 minutes.
  • Your  Achari Bhindi Bhaji is ready to serve.
  •  Acharibhindi masala can be enjoyed with steamed basmati rice or rotis.
  • It is a superb treat for the Bhindi Lovers and vegans!    


CURD RICE/DADDOJANAM

Yogurt Rice Tempered with Spices and. Pomegranate.   This moist, pleasantly seasoned rice and yogurt dish in the South Indian ...